How To Install Serum Presets

Alright, so you’ve finally downloaded your first Serum preset bank. However, you open the folder, and all you see is several .fxp files. You have no idea how to install these presets.
Don’t worry. Xfer Records has made adding third-party presets to Serum very easy. So, you won’t have to spend many hours searching how to install serum presets.
This short and simple tutorial teaches you how to install Serum presets.
Step One: Open DAW and Serum
Open your DAW, then open up Serum.
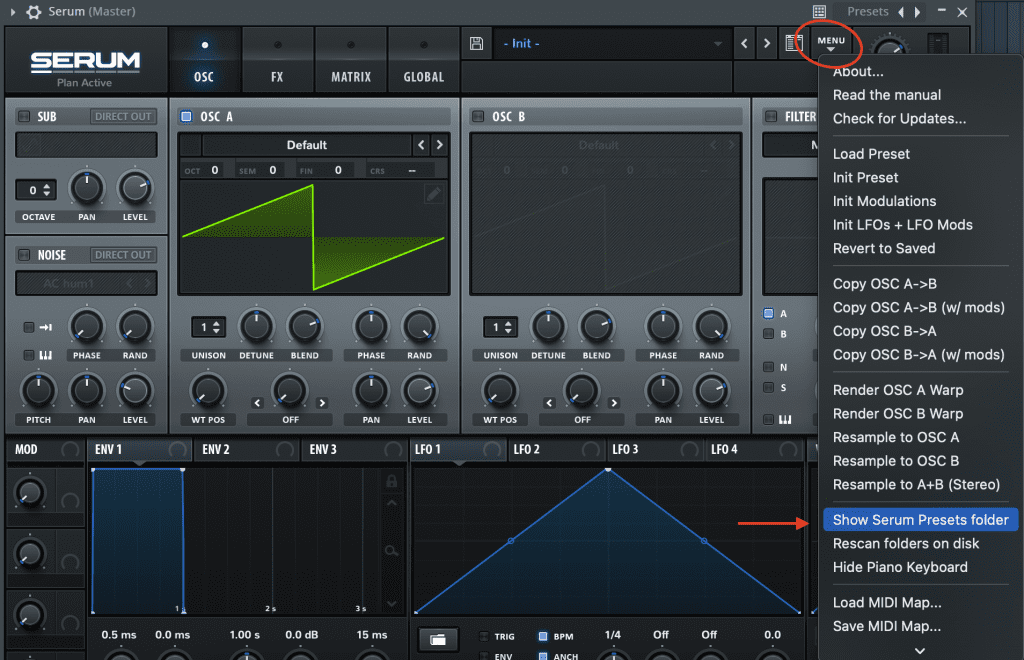
Step Two: Select Menu -> Show Presets Folder
Navigate and select the dropdown menu. Then, select the ‘Show Presets Folder’ option.
This will open up the folder where all your Serum presets are stored.
Step Three: Relocate Your Third-Party Presets
Remember that folder you downloaded full of .fxp files? Drag that folder into the folder Serum located.
Step Four: Rescan
Inside Serum, re-click the menu dropdown, then select ‘Rescan Folders On Disk.’
This will rescan your presets folder and find the new presets you just added. After the rescan, your new presets will show.

Additional Resources
Serum is an exciting plugin to use. However, it can be hard to learn how to design presets. Thankfully you can install third party banks. Knowing how to install serum presets is key if you actually want to use those presets 😉
Hopefully now you can install any bank you want. If you don’t already have a solid collection of serum preset banks check out our list for the best free serum presets.
If you’re looking for expertly designed sounds you can check our our latest bank here. This bank was created in collaboration with award winning sound designer Tolis V. So, it might be worth checking out.
Also, check out this video tutorial to learn how to design your own sounds in Serum.